Allocating tasks (PPM) - selecting from your standard tasks
When adding tasks you have the choice of a quick action task, a user defined task (complete with code and costs breakdown), a standard task or a task selected from the all tasks list.
Alternatives
This lesson steps you through adding a task/action by selecting from your standard tasks list This may not always be the most appropriate choice - you are recommended to review the lessons on adding a quick action task and adding tasks / actions by selecting from the full tasks lists as well.
The tasks list
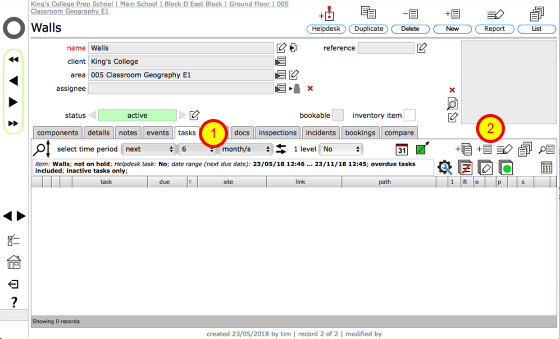
To add a task to an object, you must be looking at the maintenance tab for the object in question. For example, to add a task that relates to the walls in this classroom, first go to the record for the Classroom, then click the tasks tab (1). Then click the Add task button (2).
Adding tasks at higher resource levels
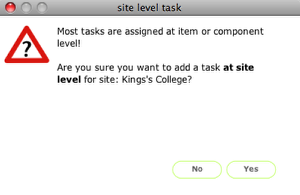
Usually, tasks relate to objects in areas or their components, i.e. a wall in a room, a boiler, a light fitting etc. It is possible to set up tasks at a higher resource level i.e. for an entire building or even an entire site. Typically these tasks might be global cleaning regimes or security patrols etc. You will see this confirmation dialog if you have your user preference for additional feedback set to Yes and you attempt to allocate a task at any resource level above the item or component level. If you actually do want to allocate a task at this level, simply click Yes.
NOTE: If you have your user preference for additional feedback set to No, then this dialog will not show, even if you start allocating a task at a higher level.
Adding tasks at item and component level
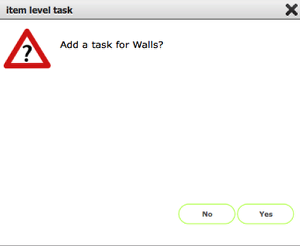
If you have your user preference for additional feedback set to Yes and you start to allocate a task at item or component level, you will see this confirmation dialog. Click Yes to continue.
Task selection
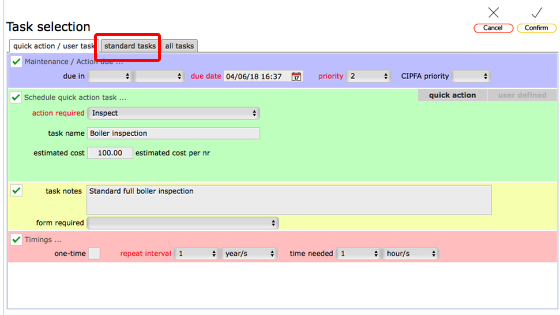
On the task selection form, click the standard tasks tab to access your list of standard tasks.
The standard tasks tab - Selecting a standard task
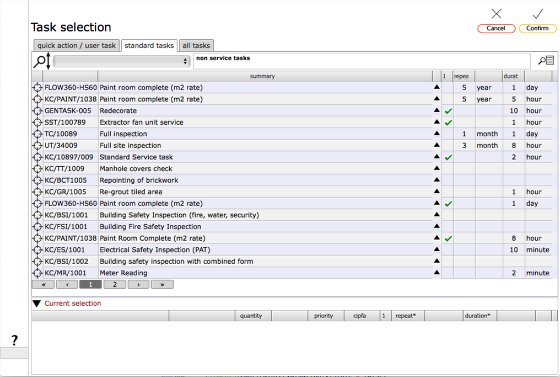
When you first arrive at this list, you will see all tasks that have been set up as Standard Tasks for the current site and/or client (see the section on Standard Tasks for more information). This gives you quick access to the most frequently used tasks for the current site and client.
To see all tasks click the all tasks tab to access full lists of all composite and component level tasks. Click the filter button to access the filters.
NOTE: It is perfectly possible to add multiple tasks to a single resource at once by re-applying the filters to list different sets of records and selecting (by using the target button) as many tasks as you like. Each one will be added to the Current selection list and the bottom of the screen and then added as a distinct task for the current resource when you finally click the Confirm button.
Standard tasks filters
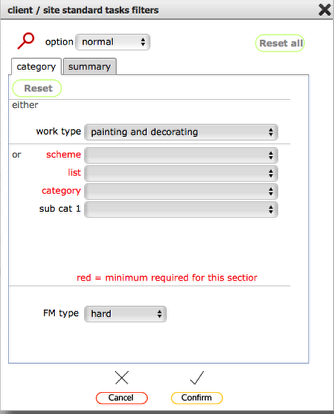
The filters panel for standard tasks allows you to get a set of records filtered by work type, categorisation scheme and sub categories as well as more general criteria such as a text string or task type. Set the criteria required (you can use both the 'source' tab and the 'category' tab criteria together if necessary) then click the Confirm button to locate and list the records that match the entered criteria.
NOTE: You can reset the filter criteria using the Reset or Reset all buttons and you can cancel the filter operation by clicking the close button on the filter dialog.
Selecting the task (or tasks) to allocate to the object
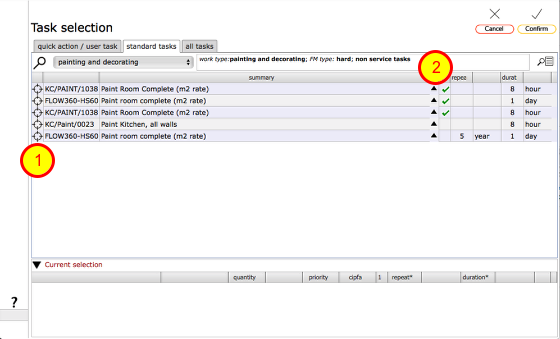
Select the tasks you want to allocate to the current object by clicking the target button (1). You can see more information about a particular task by clicking the popup info button (2)
Confirm task settings
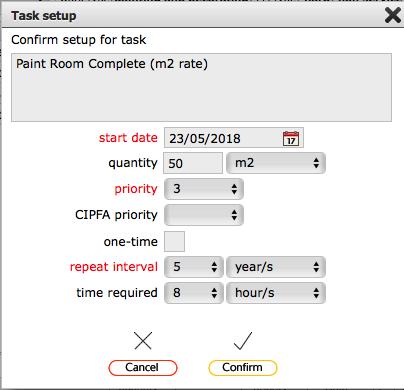
In the popup dialog, confirm the task setup details and Confirm to add the task to the current selection.
Selected tasks added to the Current selection list

Each time you click the target button, the selected task will be added to the Current selection list at the bottom of the screen.
You can remove a selected task by clicking the Delete button to the right of the relevant item in the list.
Confirm selection
To confirm your selection and allocate the selected tasks to the current object, click Confirm button at top right. Click Cancel to abort.
The selected task added to the tasks list

When the operation is completed, you will be returned to the original resource and the selected task (or tasks) will be listed along with any other tasks already set up for the resource.