Resource entry - adding custom data
Custom data can be added to a resource at any time. This lesson shows you how to add custom data to a resource as you add the resource itself.
Add custom data
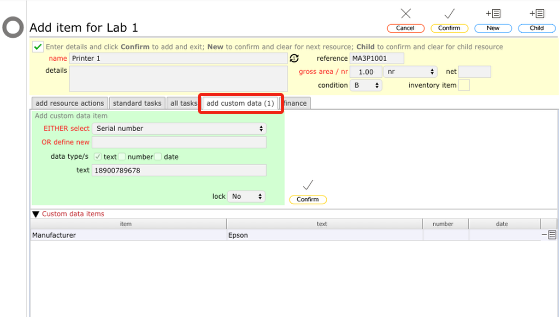
To add custom data to a resource during the 'Add resource' process, click the 'add custom data' tab
The custom data tab

You can select an existing value (i.e. 'manufacturer', 'model', 'date of installation' etc) from the select list (1) or define a new value if the one you require is not already listed on the select list by typing its label manually in the define new text box (2).
Then enter either some text (i.e. manufacturers name, paint colour etc), or enter a numeric value or enter a date (3) (or indeed any combination of the 3!).
Finally click the separate Confirm button on the add custom data tab to add the new custom data item to the list (4).
When you finally click the main Confirm button (5) (or the New or Child buttons), having entered all relevant details and allocated tasks to the resource, any custom data items entered here will be added for the current resource.