Responding to a new helpdesk issue by creating an order
How to review a newly logged Helpdesk request and send it on as a works instruction (simple route).
There are essentially 2 steps to this process:
1) review the message and the helpdesk issue itself and make any adjustments required to location/object and target time for completion
2) send the issue to a contractor or your internal workforce as an instruction
New message notification
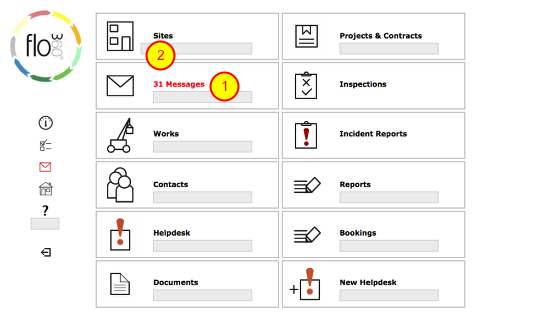
When a new helpdesk issue is logged, the helpdesk manager is informed via internal message in Flow360 and optionally by email and / or text message to a mobile phone. When you log on as a manager the Messages information line will indicate how many messages are waiting for you (1).
Click the Message button to review your messages (2)
The messages list
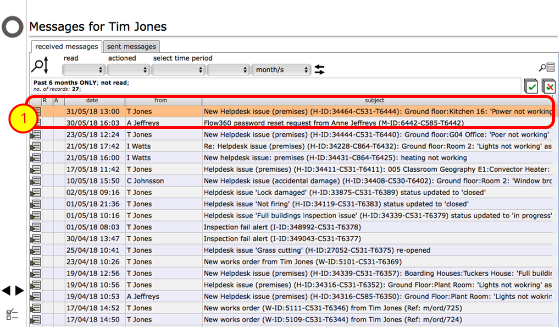
New messages will be displayed at the top of list and here you can see a new helpdesk issue that has been registered. Click the Goto button (1) to review the message contents.
NOTE: For more information on messaging in Flow360, look at the messaging section of this guide
New helpdesk issue message
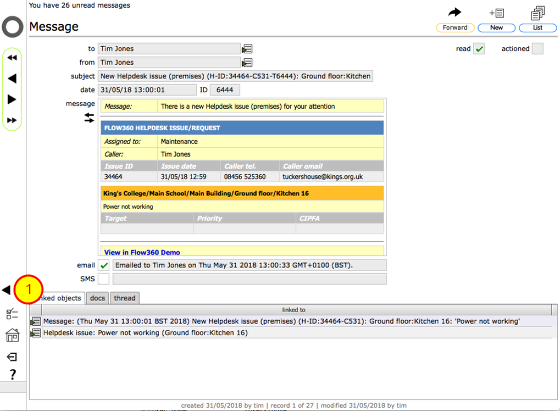
The message informs you of the arrival of a new helpdesk issue and also confirms who sent the message and the urgency of the issue if any. There is a link to the issue card itself at the bottom. Click the Goto button next to the link to review the full helpdesk issue card (1)
Helpdesk issue card
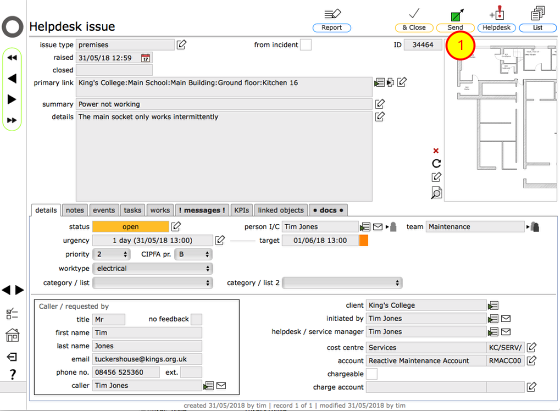
The helpdesk issue card has full details of the issue. This includes the date it was logged, the resource it relates to, the issue summary and details, the status of the issue, target date for completion and so on.
To simply send the issue on to a handyman or contractor without pre-specifying what needs to be done, you can simply click the Send button (1) at this point.
NOTE: It is possible to specify precisely what needs to be done by selecting a task and attaching it to the issue. You can also at this point pass the issue on to another manager or surveyor in which case you will no longer be in charge.
Confirm action
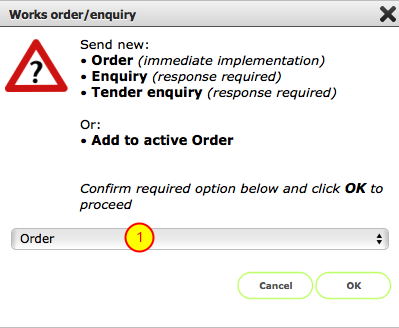
As with any other instruction, at this point you can issue a direct order or simply send an enquiry which will require a response from the contractor before a final order can be issued - this may to confirm costs or quantities or to confirm availability for instance.
To send this instruction now as an order to proceed, confirm that Order is the selected option (1) and click OK to proceed.
NOTE: You may wish to review the section on works instructions / orders more generally which gives more detail about the enquiry and order processes.
Confirm dates
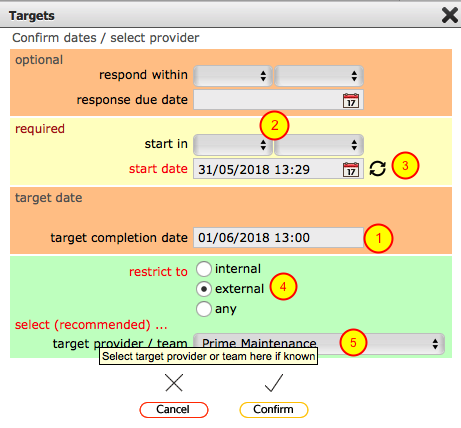
The final step is to confirm the relevant dates for this order. If a target was entered for the helpdesk issue it will be pre-filled in this dialog (1). If this is not pre-filled you can set a target manually. You only have to confirm when you would like work to start by using the 'start in' drop downs or entering a date and time manually (2). If you want work to start as soon as possible, click the Change date button (3) to set the start time to 10 minutes from the current time.
It is recommended that you pre-select the service provider you'd like to send the order to in (5).
You canrestrict the options by selecting internal / external in (4)
Click Confirm when you are done to continue.
Draft orders - select contractor
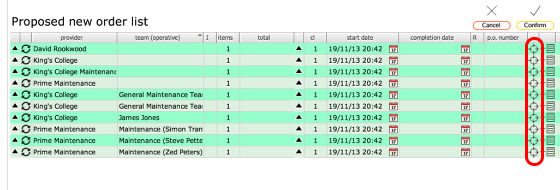
You now need to confirm who is to receive this order. All possible recipients will be listed - simply click the target button on the appropriate line to create a new order for that person.
NOTE: If you pre-selected the service provider for this order in the previous step then you will see only a single provider listed. You may also see an option to send the order to any team/s your pre-selected provider is a member of.
New work order added to the list
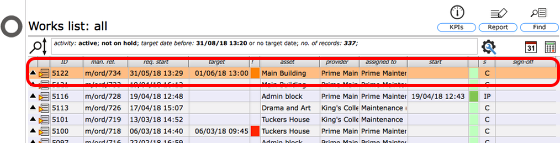
If you return to the main works list from the start screen, you will see the new order added to the list