Geographical remits
Setting the geographical areas that a service provider covers
Go to the contact (service provider) card
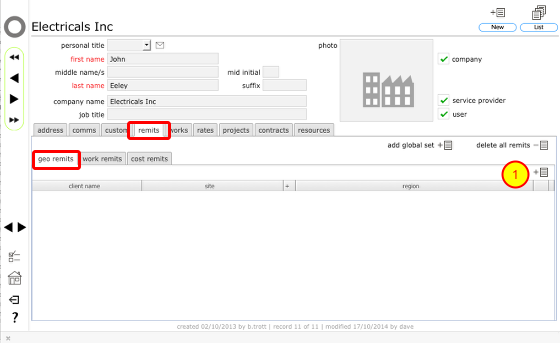
On the contact's card, click the remits tab and then geo remits tab.
Then click the New button at the top of the geo remits tab list (1).
Confirm client for this remit
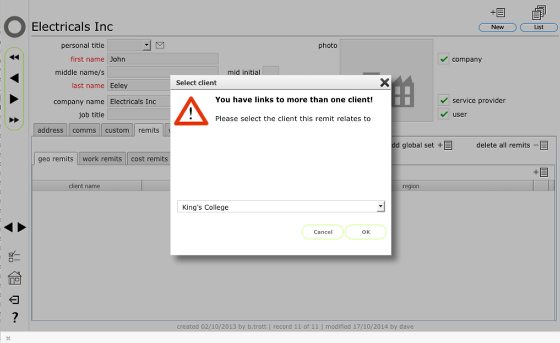
If you have links to more than one client you will see this dialog where you can confirm from the drop down list which client this remits will relate to. Select the client's name and click OK to continue.
Confirm site specific remit
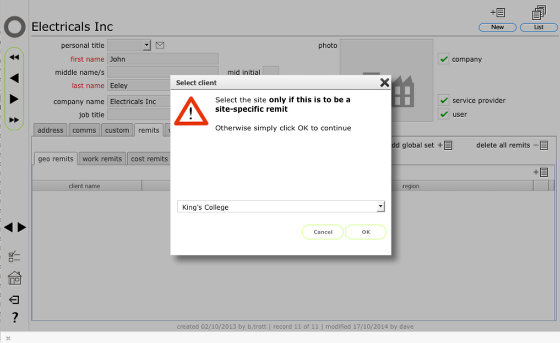
If you have links to more than 1 site you will see this dialog where you can specify a site specific remit if that is required. If you do not specify a site here then the remit will apply to all sites for the client.
Click OK to continue.
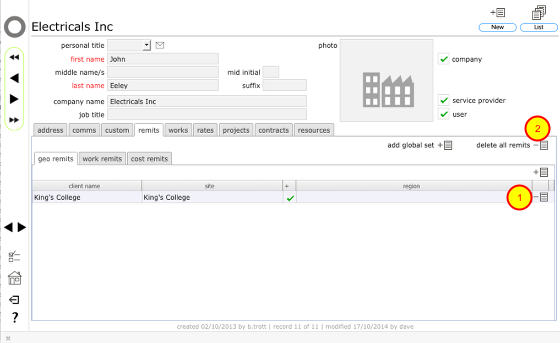
Set geographical region

A new geo remit record will be added to the list, already linked to the appropriate client (and site, if this is a site specific remit). By default the all regions (1) option will be set indicating that this remit applies nationally
To specify a particular region (county), select the appropriate region from the drop down list (2).
You can toggle the all regions option manually as well.
Now this service provider can be included in enquiries and orders for sites in the selected region/s.
Removing a geo remit
To remove a geo remit click the Delete button for the relevant remit (1).
NOTE: You can also remove ALL remits in one go (geo, cost and worktype) for a selected client using the delete all remits button (2).
Confirm action
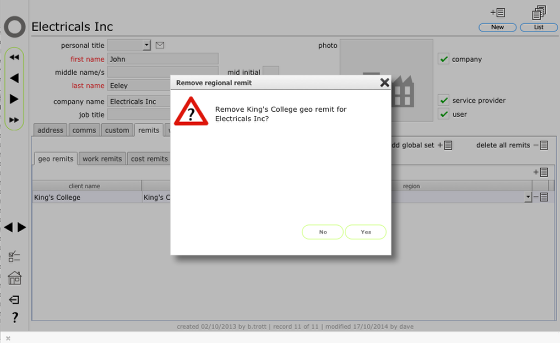
Click Yes to remove the selected remit.