Add a site
Setting up new sites in Flow360 - who does it and how.
Introduction
In general terms Owners add new sites to Flow360. Once they have added a site they establish who the client of the site is (if there is only a single client for the entire site) or they can sub-divide the site into a number of sections and assign different clients to each section.
However, once a manager or surveyor is assigned to a site he can create other sites for the same owner and client. Additionally, service providers running sites on behalf of owners and clients can create new sites on their behalf.
Follow these steps to add a new site...
The main screen
Start on the main screen.
Click the Sites button. This will take you to the list of your sites.
• If you have not yet entered any sites the list will be empty.
• If you only have a single site, you will be taken directly to the Sites card instead of the Sites list.
The New Site button

To start entering details on your new site, click the New button on the Sites list.
The New Site dialog
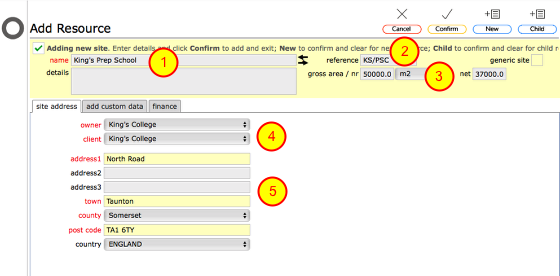
You create the basic site details on Add Resource form. The minimum required information is
- Site name
- The site reference (UPRN)
- Gross and Net usable areas
- The main owner and client of the site
- Site address
Completed new site form

The Net area will auto complete as soon as you enter the gross area but you can edit this to a different value if required. When you have entered the minimum required information, click Confirm (1) to save the site and go to the new site's record card.
Confirm and add New

If you need to add multiple sites, use the New button - this will save the current site and clear the form ready for another site to be entered.
The new site record
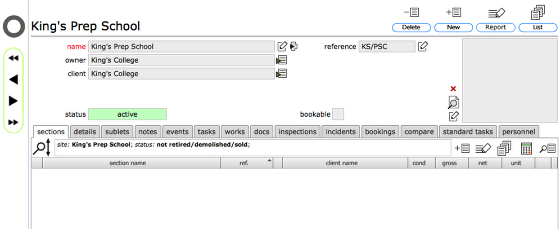
When you click the confirm button you will be taken to the newly setup site record.
Details tab
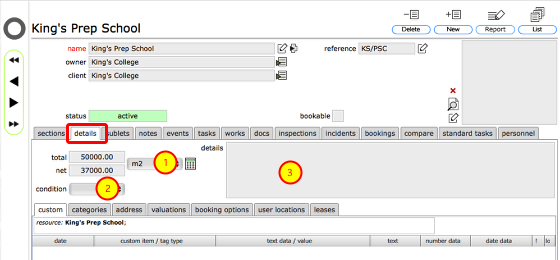
The details tab allows you add extra details -
- Site Gross and Net usable areas
- The overall Condition (where appropriate)
- Additional free text details of the site/resource