Buttons
Descriptions of the buttons you will encounter in Flow360 and what they do.
NOTE: not all versions of Flow360 have all these button options!
The sites button (start screen)
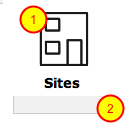
- Click to go to your sites list.
- Enter text string into quick search box and press tab key to perform quick find for a site or other resource name.
The Employees button (start screen)
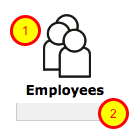
- Go to your list of employees
- Enter text string into quick search box and press return/enter/tab key to perform quick find for an employee by name, employee reference, NI number, phone no. or address part
The works button (start screen)
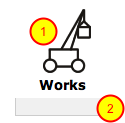
- Click to go to your works orders / enquiries list.
- Enter text string into quick search box and press tab key to perform quick find for a particular works reference.
The messages button (start screen)

- Click to go to your messages list.
- Enter text string into quick search box and press return to perform quick find for summary or text.
Text in red informs you of how many unread messages you have waiting.
The contacts button (start screen)
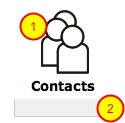
- Click to go to your contacts list.
- Enter text string into quick search box and press tab key to perform quick find for a contact by name, company name, phone number or address.
The reports button (start screen)
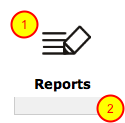
- Click to go to your reports list.
- Enter text string into quick search box and press tab key to perform quick find for a report title.
The helpdesk button (start screen)
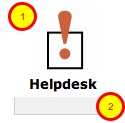
- Click to go to your helpdesk issues list. Alt-click to start a new Helpdesk issue.
- Enter text string into quick search box and press return to perform quick find for Helpdesk issue summary or details.
The New Helpdesk button (start screen)
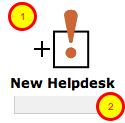
- Click to start a new Helpdesk issue. Alt-click to go to your Helpdesk issues list.
- Enter text string into quick search box and press return to perform quick find for Helpdesk issue summary or details.
The preferences button (start screen)

Click to go to your preferences settings.
Owner, client and provider users may also have the choice of going to their personal preferences or their organisation preferences.
The bookings button (start screen)

- Click to go to your bookings list.
- Enter text string into quick search box and press return to perform quick find for an booking reference.
The home button (start screen)
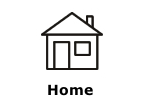
Click to got o your personal home (contact card) or optionally to the relevant owner, client, provider or manager home card.
The Courses button (start screen)

- Click to go to your courses list.
- Enter text string into quick search box and press return to perform quick find for a course by name.
The Qualifications button (start screen)
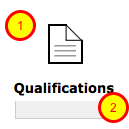
- Click to go to your bookings list.
- Enter text string into quick search box and press return to perform quick find for a qualification by name.
The tasks button (start screen)
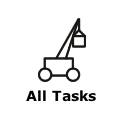
Click to go to full list of Standard, User and Flow360 core tasks.
The projects & contracts button (start screen)
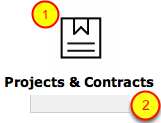
- Click to go to your projects & contracts list.
- Enter text string into quick search box and press tab key to perform quick find for an project or contract reference.
The service providers button (start screen)
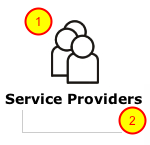
- Click to go to your service providers list.
- Enter text string into quick search box and press tab key to perform quick find for a service provider name.
The documents button (start screen)
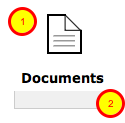
- Click to go to your documents list (all documents that you have access to)
- Enter text string into quick search box and press return to perform a quick find for document filename or summary
The return to start button

You will see this button on nearly every screen at top left. Click to return to the start screen.
The main logout button

Found on the start screen. Click to logout of Flow360.
The sidebar buttons
(1) Go to start
(2) Go to first record in current set
(3) Go to previous record in current set
(4) Go to next record in current set
(5) Go to last record in current set
(6) Go back to previous screen (history)
(7) Go to next screen (history)
The goto button
Used in many places and a key part of the Flow360 navigation system! Placed at the start of a list row or to the right of the object it relates to.
Click button to go to the relevant object.
The enhanced goto button
Used in some lists. Placed at the start of a list row. This button has dual function - an ordinary click will perform one action whereas alt-click will perform a slightly different action. The action is controlled by a user preference setting.
The default behaviour is this:
- A click will load the current single record selected on the list into the relvant card form (for example load the Helpdesk issue record from a list of Helpdesk issues);
- an alt-click wil load the full set of record currently listed into the card form. This takes longer for long lists but allows you then to step sequentially through the records using the first/previous/next/last buttons in the left sidebar.
The relevant preference setting allows to reverse this behavious if you prefer.
The change or update button
Used to update or change the object it is next to.
The primary plan button
Only used on resource cards - click to go to the primary plan for the relevant object if one exists.
Filter status button - all records listed
See section on filters for more information.
Filter status button - filtered set of records listed
See section on filters for more information.
Filter status button - filters set but not yet executed
See section on filters for more information.
Reports button (lists)
Click to start a new report based on the set of records currently listed.
Go to full list button (lists)
Click to go to full list - initially the list will contain the same set of records as are currently being viewed.
Filter button (lists)
Click the launch the filter panel. See the section on filters for more information.
Go to full list button (cards)

Click to go to full list - initially the list will contain the same set of records as are currently being viewed.
New record button (cards)

Click to create a new record of the same type as the current card.
The delete button (cards)

Click to delete the current record.
The duplicate button (cards)

Click to duplicate the current resource record and optionally all sub-resources.
The report button (cards and lists)

Click to select a report type and create a new report based on the card or list currently being viewed.
The resource record new Helpdesk Issue button

Found on area (room), item and component record cards only. Click to start a new Helpdesk issue request for the current location.
The KPIs button (Helpdesk and works lists)

Click for instant KPI report options
The send button (helpdesk issue card only)

Click to create, allocate and send a new order or enquiry for the current helpdesk issue.
The confirm and close button (helpdesk issue card only)

Click to show a dialogue to confirm Helpdesk issue as Closed
The confirm and logout button (new helpdesk issue card only)

Click to confirm (log) the new helpdesk issue and immediately logout from Flow360.
The matrix report button (courses and employees lists)

Click to generate a matrix report
The calendar button (lists)
Click the view the current set of calendar records in a calendar view.
The new enquiry/order button (lists)
Click to start a new works enquiry or order process
The add multiple button (lists)
Click to add the same scheduled task to multiple resources at once or to add the same task option to multiple tasks at once.
See relevant manual sections for more details.
The calculator button (lists)
Click to show or hide the tasks or works costs column
The add record / new button (lists)
Click to add a new record of the same type as listed
The delete button (lists)
Click to delete the current record. This cannot be undone!
The omit button (lists)
Click to temporarily omit the record from the list, optionally recalculating totals or changing the set of records to be updated etc.
The show popup button
Click to show a popup dialog with additional information on the current object e.g. contact, works order, works item, scheduled task, linked object etc
The target button (lists)
Click to select the current record.
The attach button (lists)
Click to attach a new document to the current object.
The link button (forms and lists)
Indicates if link exists (can show as green or red as well as grey). Click to go to linked object, and in some cases, click to create a new link (qualifications, objects, documents)
The assign course to employee button (courses - list / employees - list)
Click to assign the course to the listed employee or assign an employee to the course
The assign multi button (courses - list / employees - list)
Click to assign selected courses to the employee or assign the current course to multiple employees
The define user object button (tasks lists)
Click to define your own user specific task - can be used where no standard (default or other) task can be found and a specific task needs to be created.
The room redecoration button
Found on areas (room) records only on the tasks tab list. Click to amalgamate all redecoration tasks into a single room redecoration task.
The guide button
Found at bottom left on most card and list screens.
Click to open the Flow360 Guide in a new browser window or tab.
The (mini) Home button
Found at bottom left on most card and list screens and on the start screen.
Click to go to your Home card. Some users have the option of choosing between their personal home and their organisation home.
The (mini) preferences button
Found at bottom left on most card and list screens and on the start screen.
Click to go to your Preferences card.
The status gauge button (start screen)
Found on the left of the main start screen.
Click to show the startup status message with details of due tasks, works, helpdesk issues and (for training variants) supervision, appraisals and course due and coming up for expiry.
The logout button
Found at bottom left on most card and list screens.
Click to instantly logout of Flow360.
Google maps buttons (site address, contacts address, works site address)

1) Click to increase map magnification; 2) Click to decrease map magnification; 3) Click to toggle satellite imagery overlay
The confirm button

Click to confirm current choice or action.
The cancel button

Click to cancel the current choice or action.
The chart button
Click to re-chart the selected records with the chosen criteria
The view document button
Found next to thumbnails of stored documents. Click to view the document - depending on the document type and your user preferences this will open in a new browser window or tab or download the document to your computer (which you will then find in your browser's downloads folder)
The Omit multi button
Found on lists where multiple selection of records is possible. Click to omit the currently selected records from the list. Use alt-click to omit all non-selected records.
Very useful when you need to refine a set of records in a listing prior to report production for instance.
NOTE: no records are deleted when using the omit button!
The change multi button
Found on tasks lists. Generally used in conjunction with a multiple selection of records. Click to make task settings changes to the currently selected set of records.
The verify multi button
Found on tasks lists. Click to verify the current set of records to determine whether they have all the required information to be included on a works order or enquiry.