Adding and sharing documents
How to upload and share documents
Introduction
Flow360 functions as a powerful document storage and sharing system, allowing different groups of users to have access to shared documents and access and retrieve them wherever they have internet access.
Documents can be linked to qualifications, packages and training courses., providing a distribution mechanism for training providers and easy access to course materials for training recipients and employees.
Documents can also be auto-linked to works enquiries and orders, ensuring that key information is passed to service providers and that a history of this is maintained.
Most users can add documents which can then be shared with other users according to the preferences settings. (See section Setting up Standard User / Manager Preferences for more information on what the different settings mean in relation to sharing access to documents.)
Documents can be attached to most objects in Flow360 and, once a document is in Flow360, a single document can be linked to multiple objects. This allows a single site plan document to be linked to multiple buildings, scheduled tasks and works items etc avoiding the requirement for multiple copies of the same document to be stored.
Any type of document can be stored within Flow360.
Some graphic file formats can be viewed within Flow360. This includes jpegs, gifs, tiffs and pngs. These file types are useful for documents such as site plans, diagrams and photos. Thumbnail images can be attached to objects such as resources and contacts.
Any stored document can be opened in its native application from within Flow360.
The docs tab

Most objects within Flow360 have a docs tab. Click on this to view the list of documents that attached to the object, in this case a Drama and Art building.
The docs list

Each row in the list shows the filename, the file type, file size, date the document was added, the summary, the access settings, whether the document is the primary plan (tick box), whether the document has been identified as a key document (tick box).
Adding a new document from your computer and linking to the current object

To add a new document, auto linked to the current object, start by clicking the New button on the docs tab list. You will see a file selection dialog where you can select a document from your computer to upload to Flow360 and link. Navigate to the required document and click the Select button. The document will be uploaded to Flow360 and linked to the current object.
NOTE: if you select a large document, the upload process can take a little time - please be patient!
Add files selected from your computer
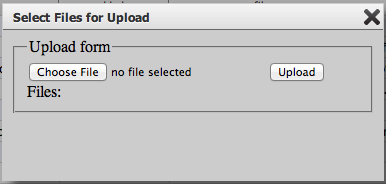
In the file upload dialogue, click the Choose file button - this will launch a standard file browser from which you can select a file from your computer for uploading.
Add multiple files
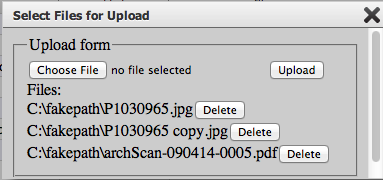
You can add multiple files by selecting each one in turn.
If you change your mind before uploading you can remove a file from the upload list by clicking the appropriate Delete button.
When you are satisfied with your selection, click the Upload button to upload the file/s. When the file/s has finished uploading you will be taken to the document card record. (In the case of multiple documents uploaded at once, you will be taken to the card for the last document uploaded)
The new document card
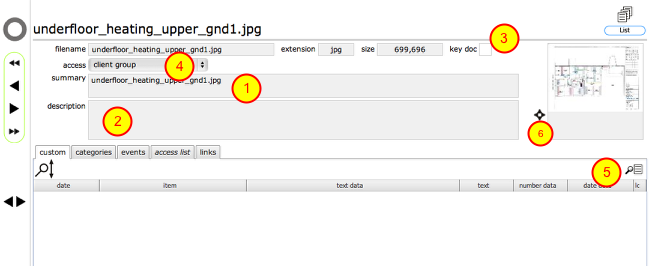
When the upload is completed you will be taken to the new document card. Here you can edit the summary line(1) and add any additional descriptive details (2) required. You can also indicate that this document is a key document by clicking the key doc check box (3).
If the new document is a supported graphic format or a pdf, a thumbnail will have been created and this will be displayed right (5). You can view the file by clicking the thumbnail or the launch button (6). Graphic files and pdfs will generally load in a new window or tab in your browser - if this does not happen make sure you have not disabled popups in your browser preference settings.
By default the access setting will use your current preference setting for document sharing, but you can change this here if you wish (4). See the section on setting user preferences for more information on what these settings mean.
Documents can also be categorised using the Omniclass classification scheme (see section on classifications for more information).