Catering service request
Example process for logging a new catering request and issuing an order
Start new Helpdesk request
Service requests are logged through the Helpdesk in the same way as reactive maintenance requests. Depending on the type of service request, additional options may be available.
This example show you how to log a new catering request.
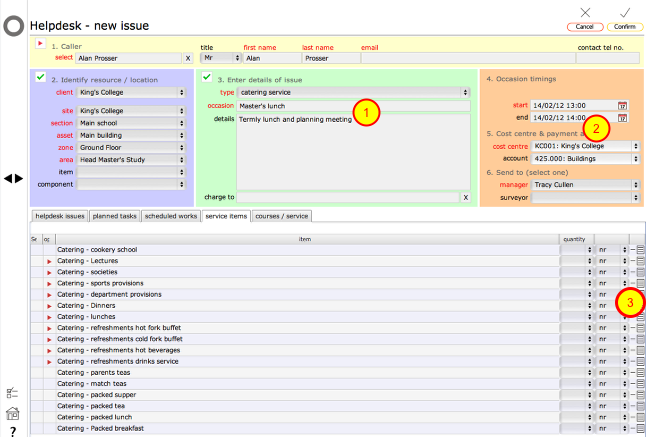
Start by opening a new Helpdesk issue. On the new issue card, make sure that the caller name and contact details are entered in section 1 and the required location is selected in section 2.
In section 3, select catering service as the issue type and add a summary and details (1). Set the date and time in section 4, including an end time if required (2).
From the service items tab list, select any standard items and confirm the quantity (3).
Service items options selection
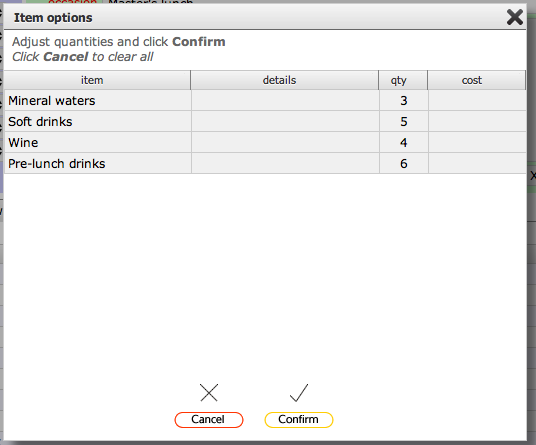
In the dialog enter the quantity of each item required. Leave the quantity column empty for any items that are not required.
Click Confirm to close the dialog and register your selections.
Choices confirmed in service items list

When you close the options dialog the relevant line on the service items list will updated with the quantity updated from the maximum number entered in the previous dialog.
The first green tick indicates that the service item has been selected and the second tick indicates that options have been set.
Service issue details tab
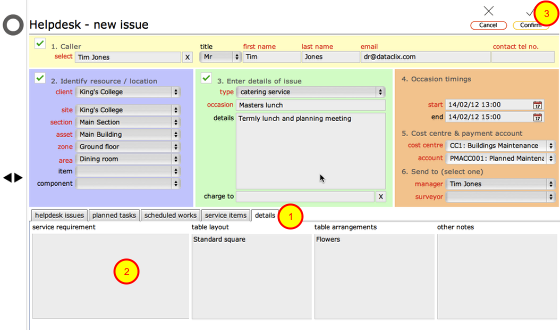
In the case of a catering request, some labels on the main form will change and there is an additional date and time box added for the end time. There is also an additional details tab on the form (1). Enter any additional information in the relevant boxes on this sub form (2).
Click the Confirm button (3) to log the request as usual.
The catering request issue card (completed and logged)
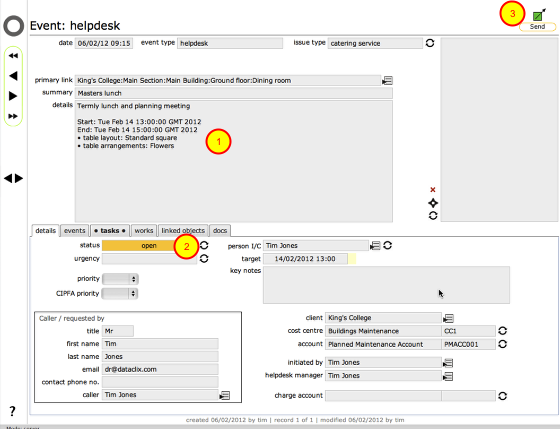
When you log a catering request, any additional information entered when you completed the issue form will be recorded in the details box on the issue card (1).
As with all Helpdesk issues, if there is no need to create an order for this issue, it can simply be signed off once completed by changing the status from open to closed and logging any required notes at the same time. To do this, click the change status button (2), complete the dialog and click Confirm. The issue will be marked as closed and the person who logged the issue will be informed.
If it necessary or desirable to generate an order from this request, click the Send button and create an order in the usual way.
Works order item
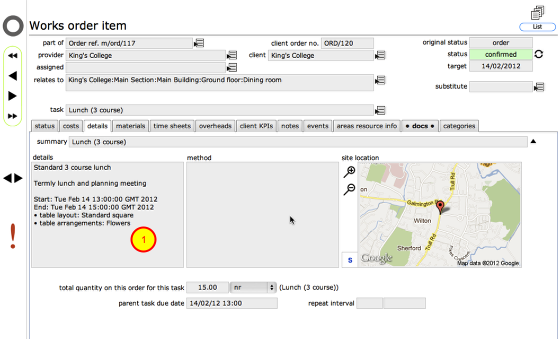
If you create an order from the Helpdesk issue, any additional details entered on the original request form will be replicated on the order item record (1) so the supplier has all relevant information on the order.