Setting up a site level default SLA
Site level SLAs
Site level SLAs are linked directly to a specific site and come into play when there isn't a more specific SLA that is relevant but there is a site level SLA. For example, when a helpdesk issue is assigned to a specific team or person in charge, Flow360 will first check to see if there is an SLA for that individual or team. If not, then Flow360 will check whether there is an SLA in place at the site level and if not, the client level.
Set up a site level SLA
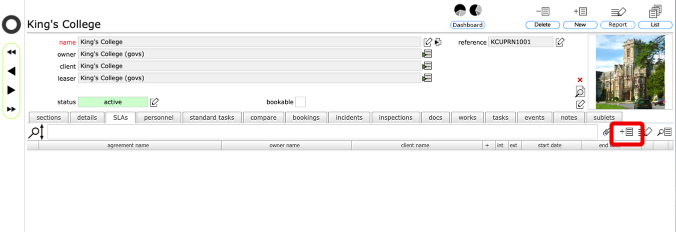
To set up a site level SLA, start on the site record and the SLAs tab. Click the Add SLA button.
Complete the outline information

- Enter a name for the agreement
- Confirm the agreement owner (automatically preset in this context)
- Confirm the agreement client (automatically preset to the site client in this context)
- Confirm the target service providers that are covered by this agreement - choose from All, All internal or All external. In each case the agreement will then be the default (ie fallback) agreement which will be used when there is no other SLA that is relevant.
- Confirm the site this agreement is for (automatically preset in this context)
- Add any further details about the agreement.
- Set the start date (preset to the current date) and, optionally, the end date, beyond which the agreement will not be in force.
- Click the Confirm button to finish the outline information.
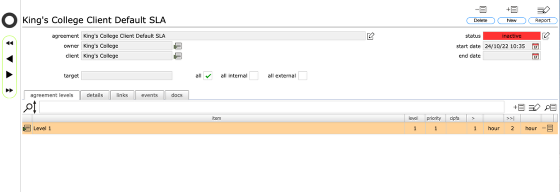
The Service Level Agreement record
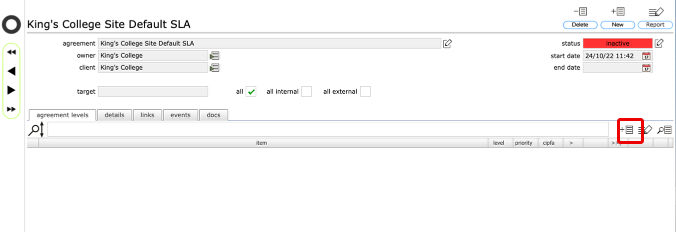
The service level agreement record confirms the information entered. The next step will be to add the specific levels to the agreement, on the agreement levels tab.
Note that at this stage the agreement is still inactive - until there are levels added, the agreement cannot be made active!
To start adding levels, click the Add level button on the tab list.
The new level dialog
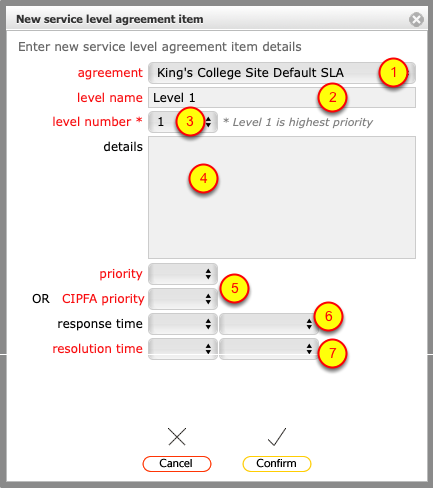
The dialog will be preset with...
- The agreement name
- The level name of the level to be added
- The level number of the level to be added (Level 1 is always the highest priority). Now you need to add ....
- Any further text information about this specific level of the agreement
- EITHER a priority level OR a CIPFA priority level - you cannot mix both types of priority scale in the same agreement and once the first level is added, all other levels in that agreement must continue to use the same priority scale (standard or CIPFA)
- Add (optionally) a response time for this level
- Add the target resolution time for this level
Confirm the level details
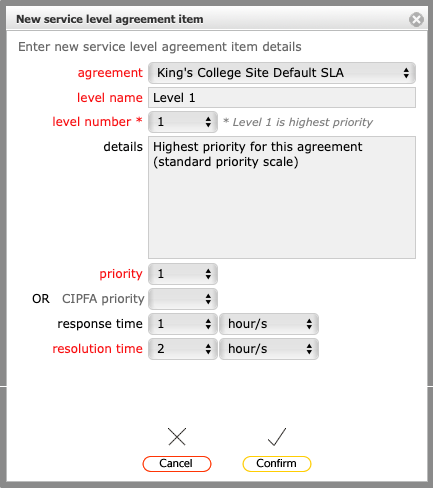
Click the Confirm button to complete setting up the level.
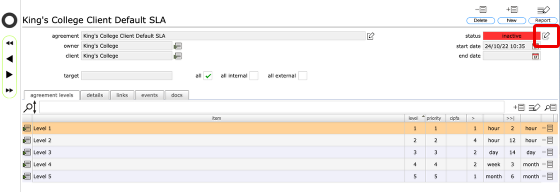
Level added to the agreement
The level has been added to the agreement.
Add further levels to cover the remaining priorities in the same manner.
Setting the agreement to active
When you've added all the relevant levels, set the agreement to active by clicking the edit button next to the status field.
Confirm new status
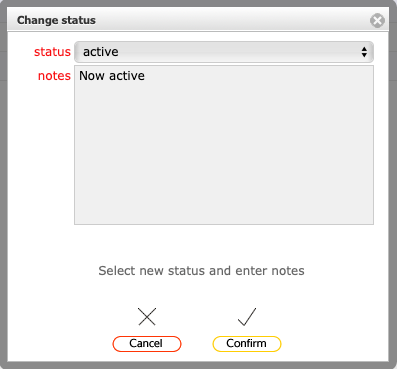
Add a note about the status change and click Confirm
Agreement is now active
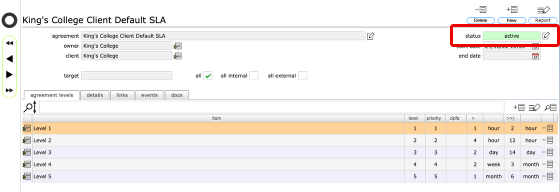
The agreement is now active and will be used to automatically set priorities, response and resolution dates as necessary.