Setting up Client Preferences
A quick guide to the various client level preferences
Confirm client home choice
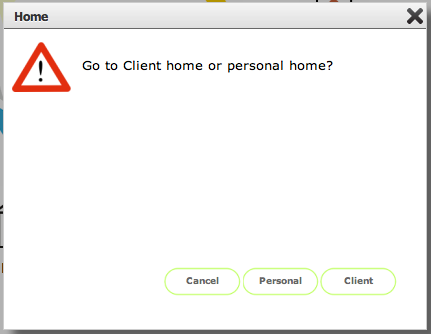
Click the Client button to confirm
Client home page
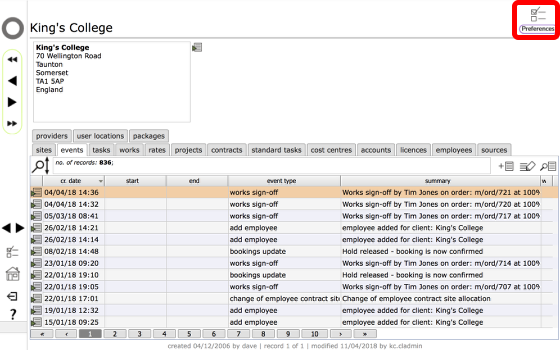
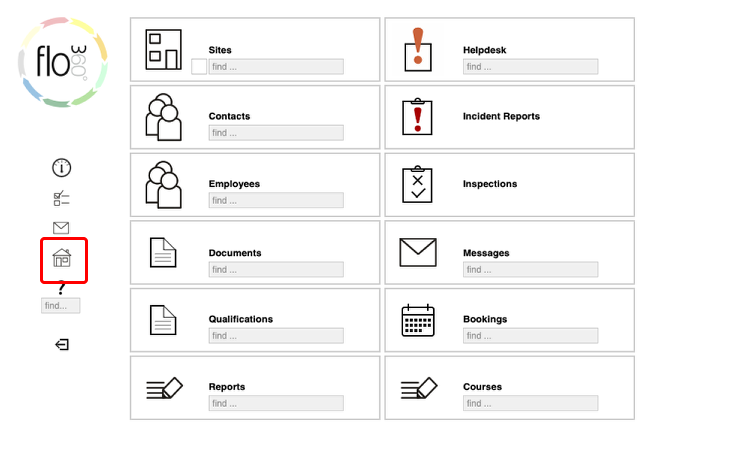
To access the Client preferences, click the Preferences button at top right
Client Preferences

The client preferences card is used to set up preferences at the client level. Generally these settings will apply to all relevant actions relating to the current client. Client preferences can be set and edited only by Client admin users - the settings affect actions carried out by Client admin and Client staff users as well as Managers, Surveyors and service providers acting on their behalf.
1. Event logging and Helpdesk options - set to Yes any or all of these to confirm which events you want to have logged in the relevant events list. Whilst you may want to log everything, you could find that the events list fills up with too much not very useful information so adjust the options here as required.
Other settings in top section:
- job title for site managers - the preferred title for managers
- additions to works are added to repeat schedule - when set to Yes additional works items that are added to an order after it has been issued will also generate new tasks in the planned maintenance schedule (use with care!)
- max no. of times a scheduled task can be postponed - set this to 0 to prevent any tasks from being postponed using the time shift button. Otherwise set to a number to allow a specified number of postponements
- these people can add sites on my behalf.... - set these options to allow or prevent users of the specified types from adding sites and resources on your behalf. Generally you would want managers and surveyors to be able to do this, but not always service providers
Custom tab

Sites, buildings and resources can all have custom data stored - this is viewable from the custom data tab on each resource's main card. There are a number of standard custom data types pre-installed by Flow360 - these can be seen in the list on the right and cannot be edited by users.
If there are additional custom data items that you wish to store about your sites and assets you can add them to the user defined list on left.
- Add button - click to add a new item.
- Delete button - click to remove any you no longer require. (this does not affect resources where these values may already have been used however).
- Setting the unique flag on a custom data item - In addition to adding your own custom data items you can specify which of these must be unique - this is useful for certain types of ID codes for instance where there should never be any duplicates. To indicate that a custom data item must be unique, click the toggle button (3) - a tick will appear in the appropriate row to confirm the setting.
Client level KPIs / ratings

Client level KPIs are allocated by managers to works undertaken on a client's behalf. Use this tab to set up the KPI headings that you wish to make available to managers on your sites.
Click the Add button (1) to add a new KPI, then edit the text (2). To remove an option click the Delete button (3).
Edit KPI / rating
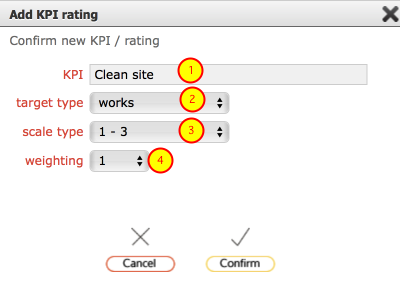
Edit the settings for the performance indicator / rating...
- Enter the label for the KPI / rating
- Set the target for where this KPI is to be applied: choose from works, helpdesk or all
- Set the scale to be used when users are rating this performance indicator - choose from 0-2 / 1-3 / 0-4 / 1-5 / 0-9 / 1-10
- Set the weighting to be applied - if the indicator carries more weight than others set the weighting to 2 or higher
Click Confirm to save
Set KPI preferences
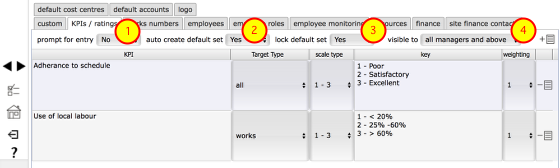
The preference settings on the KPIs / ratings tab allow you control how your KPIs / ratings are applied to Helpdesk issues and / or works orders.
- Prompt for entry - set to Yes to automatically prompt users to complete the KPIs / ratings questions to rate the service they have received in relation to Helpdesk issues or works. Set to No to leave this as an option.
- Auto create default set - set to Yes in order that a default set of KPIs / ratings are generated when a Helpdesk issue or works order is closed or signed-off.
- Lock default set - set to Yes to prevent auto-created ratings records from being deleted once created.
- Visible to - determine who will be able to see your ratings on the KPIs / ratings tabs on Helpdesk issues or works order records. Choose from 'service manager', ' all managers and above' or 'all. NOTE that the person who is responsible for adding the KPI / ratings records is always able to see records they have added.
Works numbering preferences
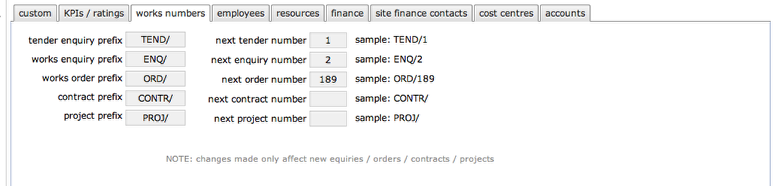
Set up default prefixes and next numbers to use for tender enquiries, works enquiries, works orders, projects and contracts.
Employee preferences
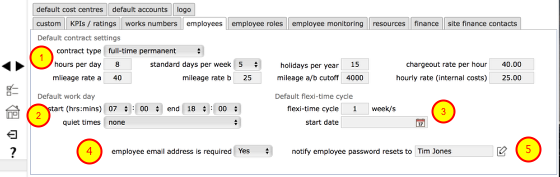
Employee preferences govern default settings for newly entered employees and employee contracts and flexi-time cycles.
- Default contract settings - indicate in these fields the standard new employment contract that will apply to newly added employees. These can all be changed on an individual basis on the employee's own contract once that has been created.
- Default work day - set the standard hours that will apply by default as the normal working day (start time and end time). Note that the number of days per week that apply by default is set in the default contract settings above. Quiet times - this setting determines whether external email and text message notifications will be sent to employees during working hours only or at any time of day or night. Choose from outside employee work day (individual employee contract working hours apply, with the default working hours specified here as the fallback - messages will not be sent outside of these hours); outside employer work day (the standard default work day hours specified here will apply and messages will not be sent outside these hours); none - there are no specified quiet times and messages will be delivered as soon as they are triggered. NOTE: if messages are triggered outside working hours and the setting here dictates that they should not be delivered outside of working hours, then the (external email / text) messages will be delayed until the start of the next working day/session and sent at that time. Internal Flow360 messages are always created as soon as they are triggered in order to maintain full accuracy of the audit and event trail.
- Employee email address is required - set to Yes in order to prevent employees from deleting all email addresses associated with their personal contact record (at least one, probably a work email address, will be required to be maintained for operational or contractual purposes)
- Notify employee password resets to - set the name of the person who will be notified by message when an employee makes a password reset request in Flow360. This is primarily to allow managers to confirm with employees that have successfully received a new password and are able to log on.
Employee roles (Training variants only)

You can specify a standard set of employee roles and for each one, set up a default set of training course and required qualifications. Once this is done, when you allocate a member of staff to a particular role, their training regime will be automatically populated with the required courses and qualifications which you can then schedule and confirm when completed / achieved.
To add a new role, click the Add button (1) and complete the options in the dialog, then set the default appraisals and supervisions for the role. (see more on this in the Flow36- Training management guide)
Resources tab

(1) These controls allow you to specify whether resources can be duplicated and who (manager and/or surveyors) is allowed to do so.
(2) automatically add new custom data.... - set this to Yes to have new custom data items that are entered during resource creation or are subsequently allocated to a an existing resource, automatically added to your user list of custom data items (see above). You can also specify which resource level these automatically added custom data labels will be available for - typically the current resource level, but you can specify all levels in which case that custom data item will be available for any resource level.
Client Finance preferences
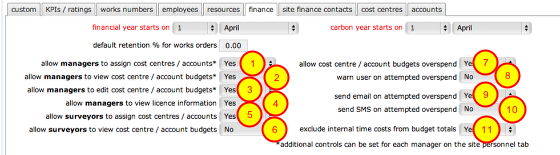
Finance preferences allow client admin users to set up financial year start date, carbon year start date (for carbon accounting) and a default retention percentage for works orders.
Additional controls are:
- Set to Yes to permit managers to assign and change cost centre assignments on tasks and works*
- Set to Yes to allow managers to view cost centre and account summaries and predictions based on the current programme of works*
- Set to Yes to allow managers to edit the cost centre and account budgets*
- Set to Yes to allow managers to view the client licence details with Flow360*
- Set to Yes to allow surveyors to assign and change cost centre assignments on tasks and works*
- Set to Yes to allow managers to view cost centre and account summaries and predictions based on the current programme of works*
- Set to Yes to allow the scheduling of new tasks and issuing of works orders that would result in the cost centre or account budget to be overspent
- Set to Yes to show an on screen warning dialogue if the current action will result in the cost centre or account budget to be overspent
- Set to Yes to automatically send an email to the client admin primary email address when an overspend is attempted
- Set to Yes to automatically send a text (SMS) message to the client admin primary mobile phone number when an overspend is attempted
- Set to Yes to exclude time sheet costs logged by members of an internal workforce from the cost centre and account budget totals (if the time used has already been paid for through a salary then the time sheet costs should generally be excluded. It is still useful to log the time in order to be able to report on hours and costs of work undertaken internally)
* For these items, additional controls for individual managers and surveyors (found on the personnel tab at the site level) can allow or disallow full access to financial details
Site finance contacts tab

For each site you can specify a person who will be the primary finance contact on the site. This person will receive finance related requests through Flow360.
One example is an automated request to set up a new charge account when required by a new Helpdesk Issue entry. (see Helpdesk chapters for more on this topic)
Another example is an automated request for a purchase order number to be raised in respect of a proposed Flow360 works order
Client Default Cost Centre preferences

It is possible to finely control the automatic allocation of tasks and works items to specific cost centres based on the client, site and even the work type of the task or works item. This list shows all the defaults currently in force for this client.
Columns 1, 2 and 3 show the client, site (empty in the case of a client level default) and work type that the default applies to. For example, row 1 in the screenshot indicates that the Special Projects cost centre will be automatically assigned to new tasks that have the work type 'grounds services' for the client King's College. No site is specified in this row so this is a client level default that will apply to all sites for this client.
Rows 4 onwards have ticks in one of the last 2 columns indicating that these are default cost centres for either planned or reactive (i.e. Helpdesk) tasks and works items. Where no site is indicated in column 2, the default applies at the client level across all sites for that client. If there is a work type indicated in column 3 then the default will only be applied to tasks of that work type.
The default client and site level cost centres are initially automatically assigned when the first cost centre for a client is created. This default can be changed to a different cost centre by clicking the change button (1) on the appropriate row.
When a new task is set up, Flow360 will attempt to find a default cost centre for the specific work type, first at the site level and then at the client level. If no work type default is found, then the site default for either reactive tasks (Helpdesk) or planned tasks (all others) will be used. If there is no site default, then the fallback client default will be used instead.
To add a new work type default, click the Add button (2), fill in the form as required and Confirm.
Work type defaults can be deleted by clicking the delete button (3) on the appropriate row.
NOTES:
- The client and site level defaults cannot be deleted as one must remain in force at all times. Work type defaults can be created and deleted as required.
- These are defaults that will be automatically applied in most cases - however it is possible to re-assign cost centres for helpdesk issues, tasks and works directly on the helpdesk issue, task or works record if necessary.
Client Default Account preferences
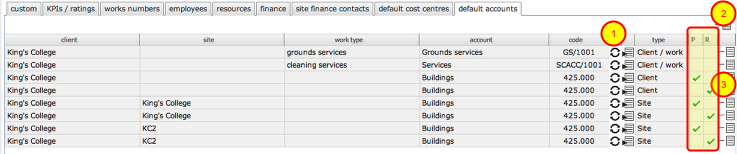
Default account setup. Set up the default planned and reactive maintenance accounts to use generally and for each individual site. These are in addition to the cost centres and are optional. Not all financial setups require both cost centres and accounts to be setup. Having access to both allows for maximum flexibility in accounting for expenditure managed through Flow360.
It is possible to finely control the automatic allocation of tasks and works items to specific accounts based on the client, site and even the work type of the task or works item. This list shows all the defaults currently in force for this client.
Columns 1, 2 and 3 show the client, site (empty in the case of a client level default) and work type that the default applies to. For example, row 1 in the screenshot indicates that the Grounds services account will be automatically assigned to new tasks that have the work type 'grounds services' for the client King's College. No site is specified in this row so this is a client level default that will apply to all sites for this client.
Rows 3 onwards have ticks in one of the last 2 columns indicating that these are default accounts for either planned or reactive (i.e. Helpdesk) tasks and works items. Where no site is indicated in column 2, the default applies at the client level across all sites for that client. If there is a work type indicated in column 3 then the default will only be applied to tasks of that work type.
The default client and site level accounts are initially automatically assigned when the first account for a client is created. This default can be changed to a different account by clicking the change button (1) on the appropriate row.
When a new task is set up, Flow360 will attempt to find a default account for the specific work type, first at the site level and then at the client level. If no work type default is found, then the site default for either reactive tasks (Helpdesk) or planned tasks (all others) will be used. If there is no site default, then the fallback client default will be used instead.
To add a new work type default, click the Add button (2), fill in the form as required and Confirm.
Work type defaults can be deleted by clicking the delete button (3) on the appropriate row.
NOTES:
- The client and site level defaults cannot be deleted as one must remain in force at all times. Work type defaults can be created and deleted as required.
- These are defaults that will be automatically applied in most cases - however it is possible to re-assign accounts for helpdesk issues, tasks and works directly on the helpdesk issue, task or works record if necessary.
Logo tab

For some users it is possible to use your own logo in place of the Flow360 logo on start screens, and report outputs. If you wish to do this note that preferred image files in pixels are 220x220 for the start screen logos and 60x40 for the report output logos.
- To upload your own logo, click the Upload button, then follow the steps to choose the relevant image file from your computer to upload.
- If you have uploaded your own logos and wish these to be displayed for your site and your employees then you must also click the Use custom logos option. Log out and back in again to activate the new setting.
- Target website - when users click on the logo on the start screen they can be directed to your own web site - enter the URL of the relevant website here.