Assigning a document as the key image
Assigning key image for a resource / object from docs tab list
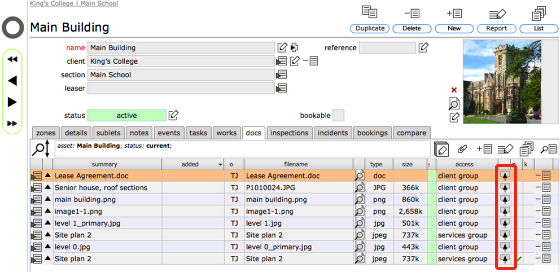
If the relevant image file is already linked and listed on the docs tab list, you can change the image currently displayed top right on the resource or object record, by simply clicking the 'set as key image' button on the relevant row on the docs tab list.
NOTE: This can only be done by people with edit access to the resource record!
Assigning key image for a Helpdesk issue from docs tab list
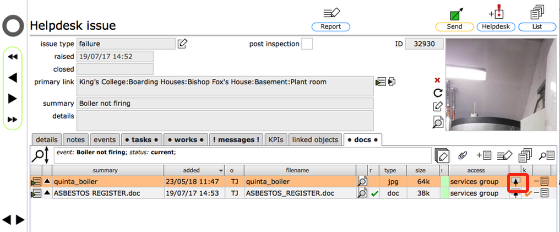
For Helpdesk issues the process is the same: If the relevant image file is already linked and listed on the docs tab list, you can change the image currently displayed top right on the issue record, by simply clicking the 'set as key image' button on the relevant row on the docs tab list.
NOTE: This can only be done by people with edit access to the resource record!
Image set as new key image for issue
Assigning key image by selecting from the docs library
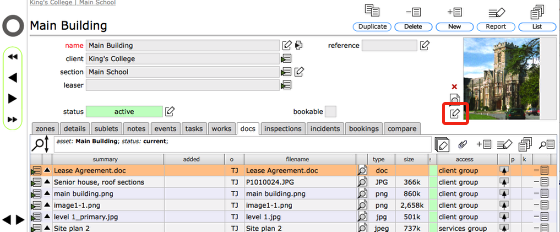
If the relevant document is not already listed on the docs tab list but is in the main documents library, click the edit button to the left of the image box itself.
Confirm action
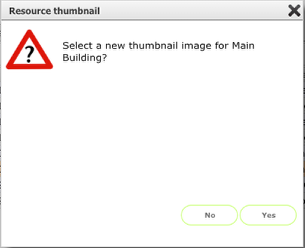
Click Yes to proceed.
Select document from list
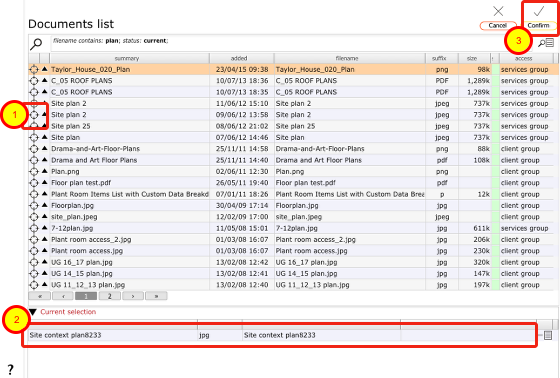
- Filter the list if necessary to locate the relevant document and then click the target button on the relevant row to select the document as the key image for the resource / object / issue.
- The selected document will be listed in the current selection at the bottom of the screen.
- Now click Confirm to set the image.
You will be returned to the relevant recor for the resource / obkect / image and the selected image will be displayed as the key image on the record.