Users and default locations
Allocating users to a default location speeds up entry of new Helpdesk issues. It can also limit their access to specific parts of the site. Here's how to set this up.
Overview
Allocating users as general users linked to a specific location has 2 principle purposes:
- The location is preset as their default location when starting to register a new Helpdesk issue
- It sets the location as the part of the site they have access to and can limit their access to other parts of the site/s
NOTES:
- When a person is allocated to multiple locations, they will have access to all those locations - you can allocate an individual to as many locations as required.
- You can also grant 'full site' or 'all sites' access at the same time.
- The resource level that is most specific is the one used as the default location for new Helpdesk issues. For example, where a person is allocated to the Main Building and also to Room 25 on the Ground Floor of the Science Building, Room 25 will be their default location because it is more specific than simply Main Building. However they will have full access to Main Building as well. Note that they will not have access to any other location in the Science Building unless they are also allocated to the Science Building itself.
Start at the relevant location
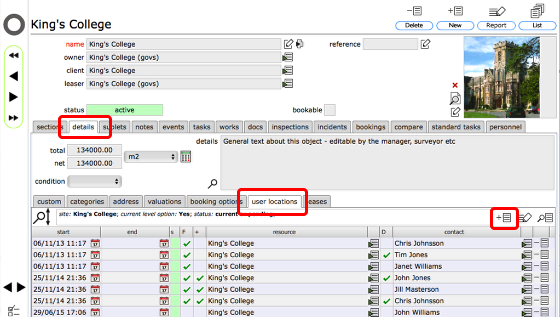
To allocate a specific location to a user, start by navigating to the relevant location. On every resource record you will find a user locations sub-tab on the details tab. Click this tab to show a list of people currently registered against that location.
To add one or more new people to this list, click the Add button.
Set access dates
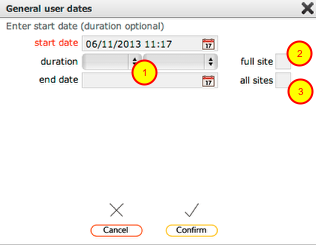
Access to locations can be limited by date - if an end date to this access is required set an appropriate date range (1).
Otherwise simply set a start date (this defaults to the current date).
In addition to setting a default specific location (such as a room) you can also grant access to the full site or to all sites. Click the approriate boxes (2) and/or (3) as required.
Finally click Confirm to finish.
Select users to add
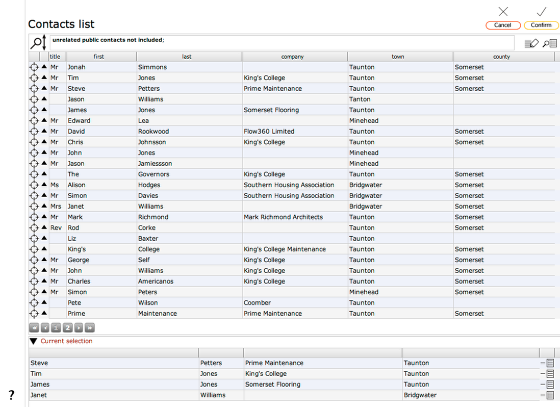
Select users by clicking the target button on the relevant row on your contacts list. You can select as many people as you need to by clicking the target button for each in turn.
Click Confirm to continue.
Selected users added to list

The users selected will be added as general users at the location. In this case the 'full site' option was also set and each of the new records has a tick in the 'F' column to confirm that they have full site access.
NOTE: To remove or add full site or all sites access you can check or un-check these settings directly on this list.
Access to the full general users lists
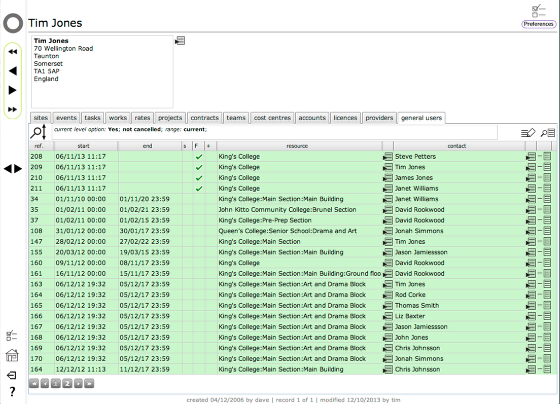
Client admin users and Managers can also review the list of general users (and make changes to the full site or all sites settings) on their respective home screens. Use the filter button to find specific users.