Creating and using custom inspection forms
Creating a new standard task with a custom inspection form
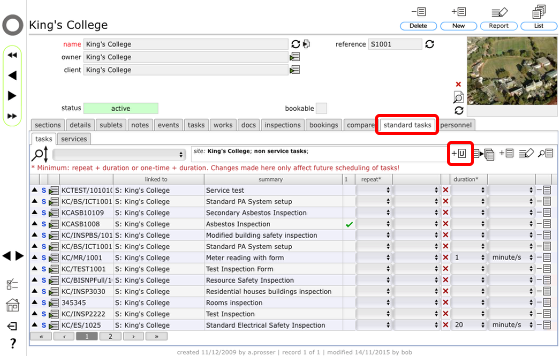
Start on the site record, select the standard tasks tab.
Click the add user defined task button to define a new standard task to which you are going to attach a generic inspection form to customise.
Set up the new inspection task
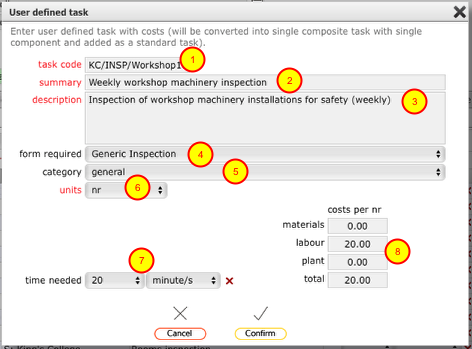
Complete the form with the details of the new inspection:
- Enter a unique code for the inspection task
- Add the task summary
- Add further details as required
- Select the generic inspection form option from the form required list
- Optionally specify the category (i.e. work type) for this inspection
- Select 'nr' as the units
- Optionally specify the amount of time needed to carry out the inspection
- Optionally specify a cost that attaches to carrying out this inspection
Finally click Confirm to create the inspection task.
The inspection task added to the standard tasks list
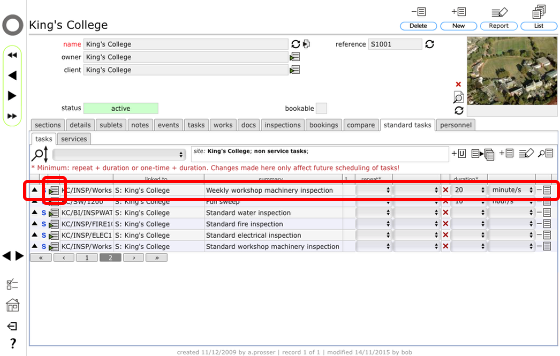
The new task has been added to the list. Now you want to go to the task record in order to edit the form inspection items.
Click the goto button on the row for the newly created inspection task.
The inspection task record
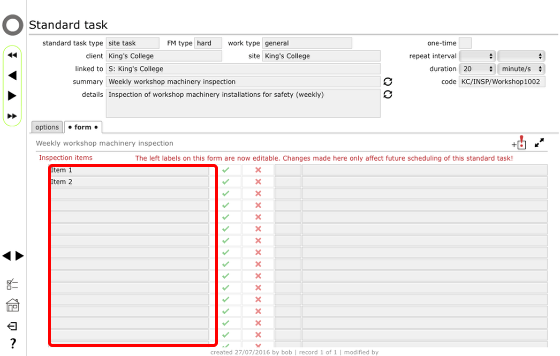
The editable form will show on the form tab, intially with just Item 1 and Item 2 entered.
The inspection items in the left column are fully editable - rename the first 2 and add as many others as you required for this inspection task (there are up to 34 items allowed per inspection). Each item should be phrased in such a way that a yes/no answer is possible.
The edited form
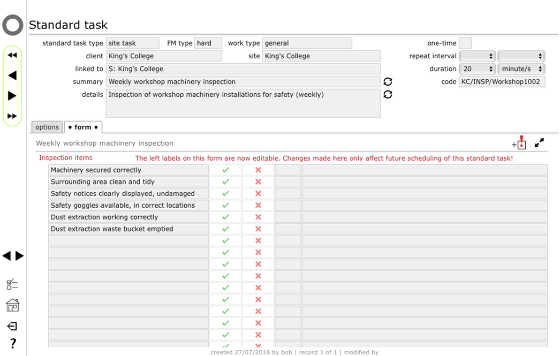
Your form is now ready for use.
The next step is to create a scheduled inspection task linked to the relevant room location or object.
Create a scheduled task using this inspection form
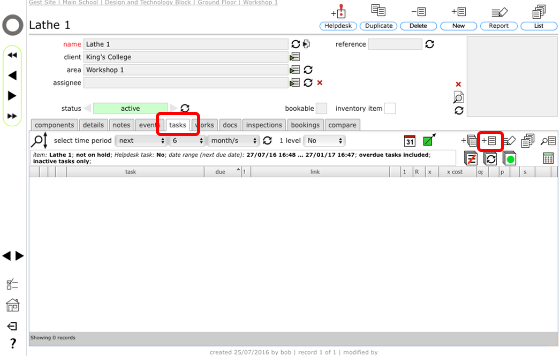
Now go to the record for the relevant location or object and select the tasks tab.
Click the add task button.
Select your inspection standard task
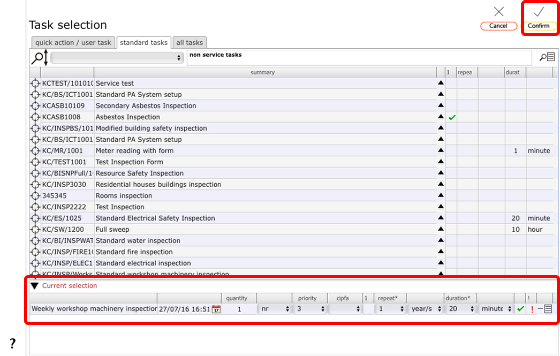
On the task selection form, click the standard tasks tab in order to select your inspection task from the list by clicking the target button on the relevent row. The selected task will be added to the current selection list at the bottom.
Click Confirm to continue.
The inspection task added to the tasks list
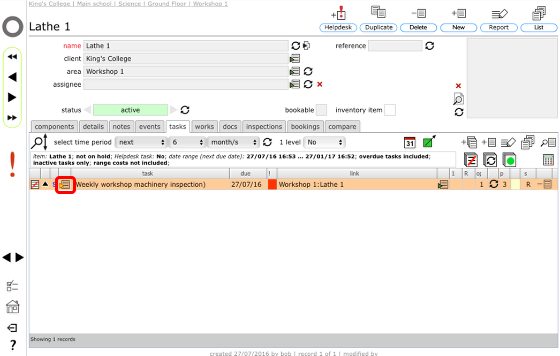
Your new inspection task has now been added to the scheduled tasks. Click the goto button to view the task record itself.
The task record
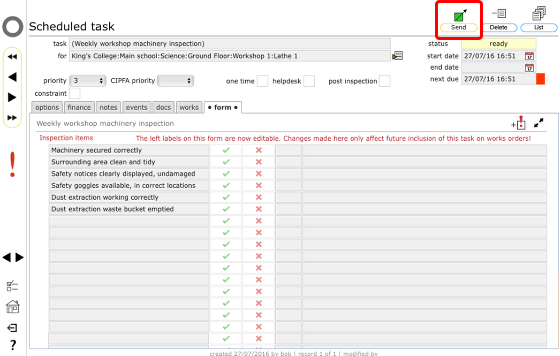
On the form tab on the task record the contents of the form can be further edited if necessary for this specific application of this inspection.
When you are ready to implement the first inspection, click the Send button (or you can include the task on an order with other line items selected from your tasks list in the normal way).
The inspection task on the works order
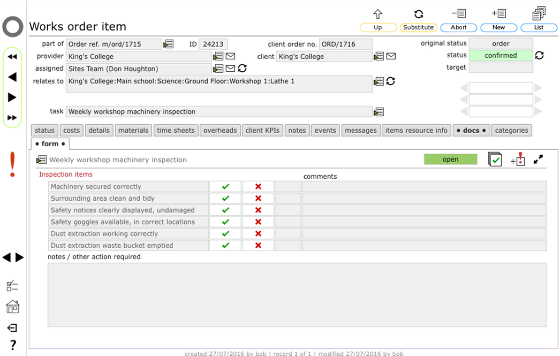
Skipping ahead to the order record itself, the inspection form is now attached to the line item on the order and can be filled as normal.
NOTES:
- The form on the order has been automatically shortened to only display the inspection items for this specific inspection.
- You can of course put the entire order on an auto-repeat basis in order to automate a rolling programme of daily, weekly or monthly inspections as required.