Setting targets (meter readings)
Viewing usage charts and target charts
Introduction
Meter readings and some other types of 'inspections' can be charted to show changes over time. It is also possible to create targets that can then be used to compare one set of readings against one or more stored baselines or targets. For example you might want to compare the 3 months of electricity consumption up to today with a similar period from last year, or with 2 or 3 3-month periods during the last year.
Add a new manual target
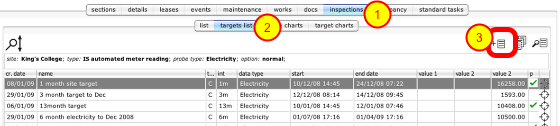
Targets are linked to the object being viewed at the time they are created. To add an electricity consumption target for a building, first go to the building. To set up a new target manually, first click the inspections tab (1), then the targets list tab (2), then click the New button (3)
Enter target details
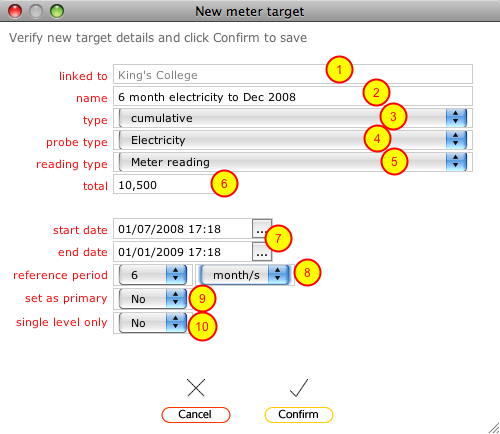
As this is a manually created target, you must fill in all the fields appropriately for the type of target you are creating.
(1) The resource this target is linked to - this is filled in automatically and relates to the object being viewed, in this case the site.
(2) Choose an appropriate name for this target
(3) Set whether this is a cumulative or range target (cumulative is used for things like electricity, gas and water consumption whereas range is appropriate for temperature, gas concentrations etc)
(4) and (5) Set the probe and reading types that this target relates to
(6) Enter the target value (for cumulative targets like this you only enter a single value - for range targets you enter a minimum and maximum value)
(7) Enter the start and end dates that the target relates to
(8) Set the reference period
(9) You can choose to have this target stored as the primary target of its type
(10) Specify whether the target relates only to the resource level being viewed or to all sub-resource levels as well. For instance, if this cumulative electricity consumption target relates to all meter readings on the site you would set this to No whereas if it relates to the readings from a single meter at the site level you would set it to Yes.
Finally click Confirm to save the target in the targets list.
Saving a new automatically generated target

Start by filtering the inspections records to show a set of records for a specific probe / type (e.g. electricity) and inspection type (e.g. IS automated meter reading).
Click the create auto target button
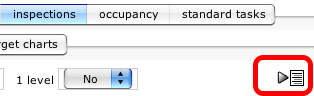
The create auto target button will not be visible until you have filtered the records as above!
Confirm target information
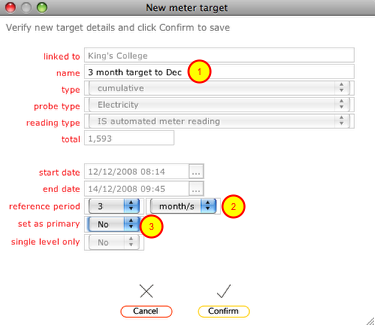
As this is an auto generated target, most of the information is filled in for you. You simply need to give the target a name (1) and confirm the reference period that it relates to (2). You can also choose to set this target as the primary target of its type for the specified reference period (3).
Finally click Confirm to save the target.